关键字
react-spring
react-transition-group
Transition、CSSTransition、TransitionGroup、SwitchTransition
@use-gesture/react
不支持react19
react-spring/web
官方文档:react-spring
安装
1
| npm install --save @react-spring/web
|
使用
react-spring 主打的是弹簧动画,就是类似弹簧那种回弹效果。
只要指定 mass(质量)、tension(张力)、friction(摩擦力)就可以了。
mass 质量:决定回弹惯性,mass 越大,回弹的距离和次数越多。
tension 张力:弹簧松紧程度,弹簧越紧,回弹速度越快。
friction:摩擦力: 可以抵消质量和张力的效果
react-spring 有不少 api,分别用于单个、多个元素的动画:
- useSpringValue:指定单个属性的变化。
- useSpring:指定多个属性的变化
- useSprings:指定多个元素的多个属性的变化,动画并行执行
- useTrial:指定多个元素的多个属性的变化,动画依次执行
- useSpringRef:用来拿到每个动画的 ref,可以用来控制动画的开始、暂停等
- useChain:串行执行多个动画,每个动画可以指定不同的开始时间
useSpringValue(单动画)
1
| const springValue = useSpringValue(targetValue, config);
|
参数:
返回值:
1
2
3
4
5
6
7
8
9
10
11
12
13
14
15
16
17
18
19
20
21
22
23
| import { useSpringValue, animated, useSpring } from '@react-spring/web'
import { useEffect } from 'react';
import './App.css';
export default function App() {
const width = useSpringValue(0, {
config: {
duration: 2000
}
});
useEffect(() => {
width.start(300);
}, []);
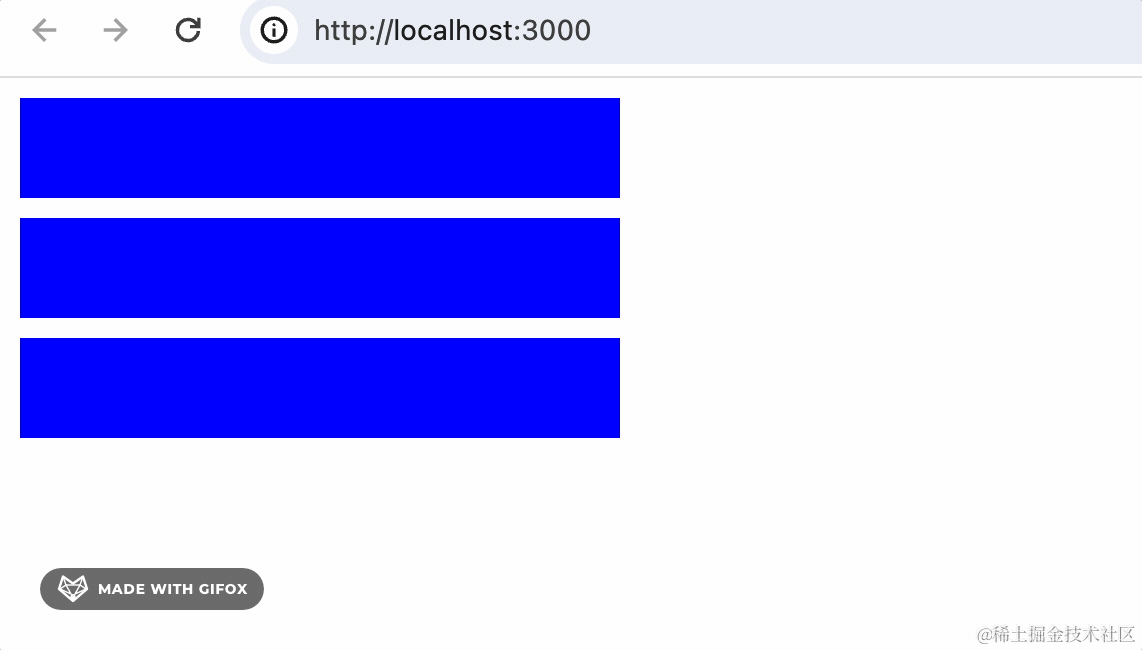
return <animated.div className="box" style={{ width }}></animated.div>
}
.box {
background: blue;
height: 100px;
}
|
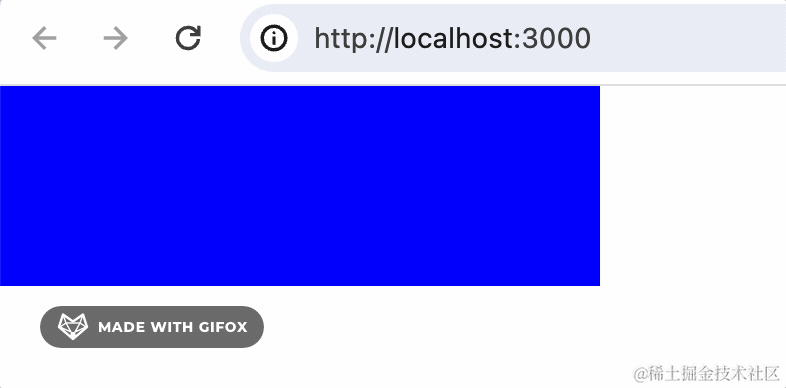
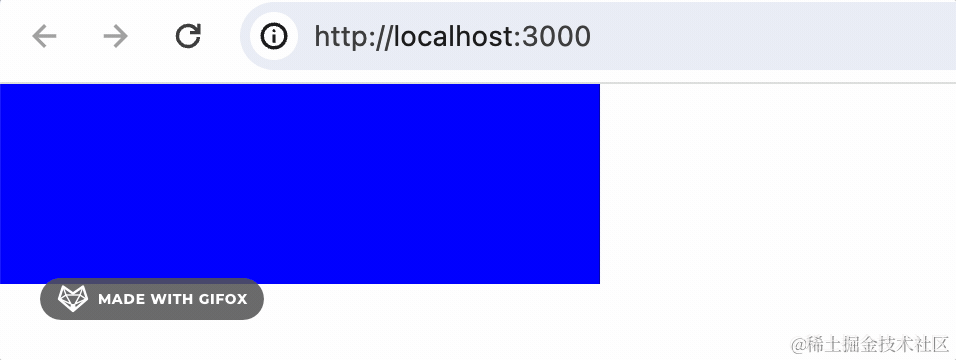
可以看到,box 会在 2s 内完成 width 从 0 到 300 的动画:
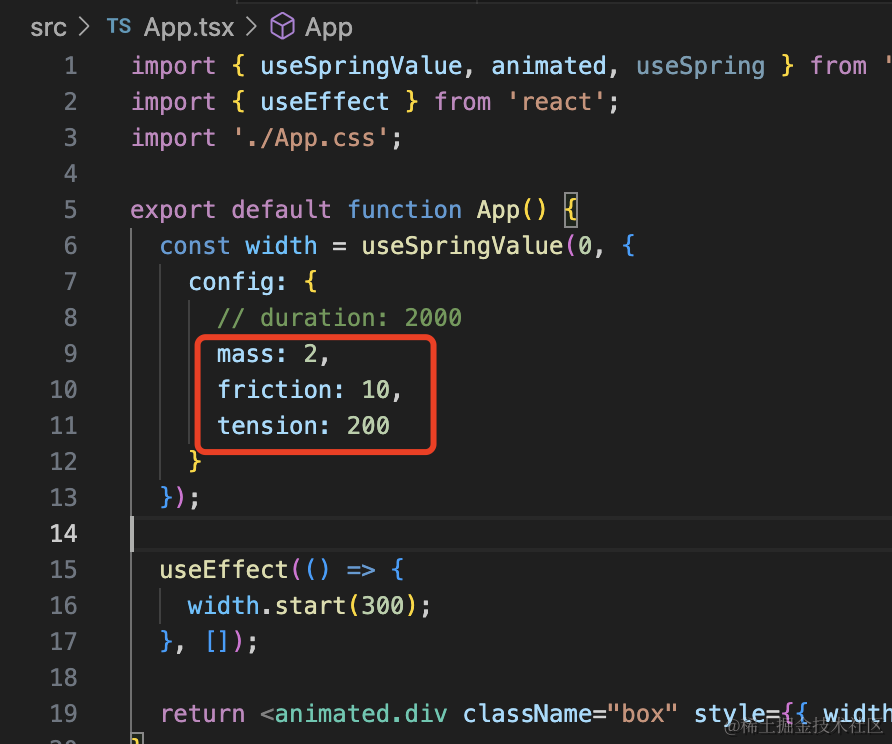
此外,你还可以不定义 duration,而是定义摩擦力等参数:
1
2
3
4
5
6
7
8
| const width = useSpringValue(0, {
config: {
mass: 2,
friction: 10,
tension: 200
}
});
|
mass 质量:决定回弹惯性,mass 越大,回弹的距离和次数越多。
tension 张力:弹簧松紧程度,弹簧越紧,回弹速度越快。
friction:摩擦力: 可以抵消质量和张力的效果
效果:
useSpring(单动画多属性)
1
2
3
4
5
| const styles = useSpring({
from: { opacity: 0 },
to: { opacity: 1 },
config: { tension: 120, friction: 14 }
});
|
参数:
from(可选):初始状态 { key: value }to(必填):目标状态 { key: value }config(可选):动画配置- 其他钩子参数(如
onRest 回调)
返回值:
styles 对象,包含可以直接绑定到 style 的动画值
useSprings
1
2
3
4
5
6
7
8
9
10
| const [springs, api] = useSprings(
count,
(index) => ({
from: { width: 0 },
to: { width: 300 },
config: {
duration: 1000
}
})
)
|
参数:
count(必填):动画对象数量(index) => object(必填):返回一个包含 from, to, config 的对象
返回值:
springs 数组,每个元素都是一个 style 对象
1
2
3
4
5
6
7
8
9
10
11
12
13
14
15
16
17
18
19
20
21
22
23
24
25
26
27
28
| import { useSprings, animated } from '@react-spring/web'
import './App.css';
export default function App() {
const [springs, api] = useSprings(
3,
() => ({
from: { width: 0 },
to: { width: 300 },
config: {
duration: 1000
}
})
)
return <div>
{springs.map(styles => (
<animated.div style={styles} className='box'></animated.div>
))}
</div>
}
.box {
background: blue;
height: 100px;
margin: 10px;
}
|
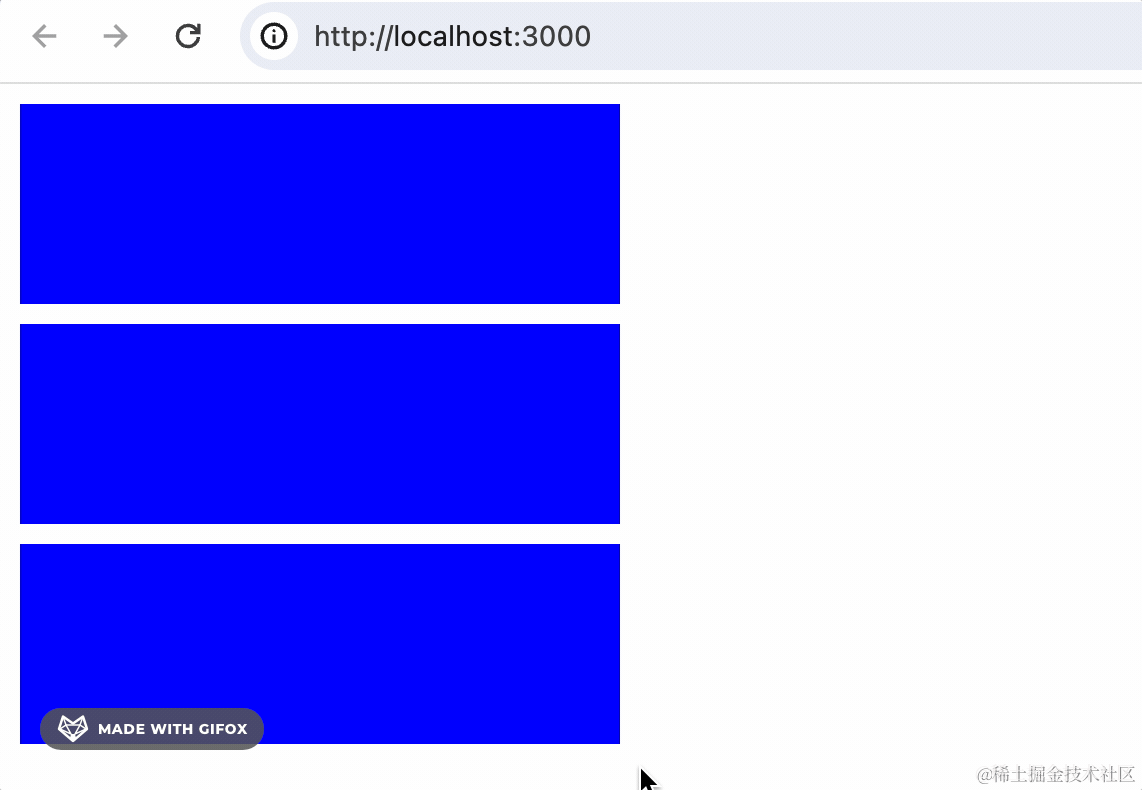
当你指定了 to,那会立刻执行动画,或者不指定 to,用 api.start 来开始动画:
1
2
3
4
5
6
7
8
9
10
11
12
13
14
15
16
17
18
19
20
21
22
23
24
25
| import { useSprings, animated } from '@react-spring/web'
import './App.css';
import { useEffect } from 'react';
export default function App() {
const [springs, api] = useSprings(
3,
() => ({
from: { width: 0 },
config: {
duration: 1000
}
})
)
useEffect(() => {
api.start({ width: 300 });
}, [])
return <div>
{springs.map(styles => (
<animated.div style={styles} className='box'></animated.div>
))}
</div>
}
|
useTrial
如果多个元素的动画是依次进行的
这时候要用 useTrail
1
2
3
4
5
6
7
8
9
10
11
12
13
14
15
16
17
18
19
20
21
22
23
24
25
| import { animated, useTrail } from '@react-spring/web'
import './App.css';
import { useEffect } from 'react';
export default function App() {
const [springs, api] = useTrail(
3,
() => ({
from: { width: 0 },
config: {
duration: 1000
}
})
)
useEffect(() => {
api.start({ width: 300 });
}, [])
return <div>
{springs.map(styles => (
<animated.div style={styles} className='box'></animated.div>
))}
</div>
}
|
用起来很简单,直接把 useSprings 换成 useTrail 就行:

useSpringRef
1
2
| const springRef = useSpringRef();
const styles = useSpring({ opacity: 1, ref: springRef });
|
参数:
返回值:
springRef,可用于控制动画的生命周期(开始、暂停等)
useChain
1
| useChain([ref1, ref2], [0, 0.5]);
|
参数:
refs(必填):一个包含多个 useSpringRef 的数组delays(可选):每个动画的启动时间,范围 0 ~ 1
返回值:
1
2
3
4
5
6
7
8
9
10
11
12
13
14
15
16
17
18
19
20
21
22
23
24
25
26
27
28
29
30
31
32
33
34
35
36
37
38
39
40
41
42
43
| import { animated, useChain, useSpring, useSpringRef, useSprings, useTrail } from '@react-spring/web'
import './App.css';
export default function App() {
const api1 = useSpringRef()
const [springs] = useTrail(
3,
() => ({
ref: api1,
from: { width: 0 },
to: { width: 300 },
config: {
duration: 1000
}
}),
[]
)
const api2 = useSpringRef()
const [springs2] = useSprings(
3,
() => ({
ref: api2,
from: { height: 100 },
to: { height: 50},
config: {
duration: 1000
}
}),
[]
)
useChain([api1, api2], [0, 1], 500)
return <div>
{springs.map((styles1, index) => (
<animated.div style={{...styles1, ...springs2[index]}} className='box'></animated.div>
))}
</div>
}
|
我们用 useSpringRef 拿到两个动画的 api,然后用 useChain 来安排两个动画的顺序。
useChain 的第二个参数指定了 0 和 1,第三个参数指定了 500,那就是第一个动画在 0s 开始,第二个动画在 500ms 开始。
如果第三个参数指定了 3000,那就是第一个动画在 0s 开始,第二个动画在 3s 开始。
过渡动画使用-useTransition
1
2
3
4
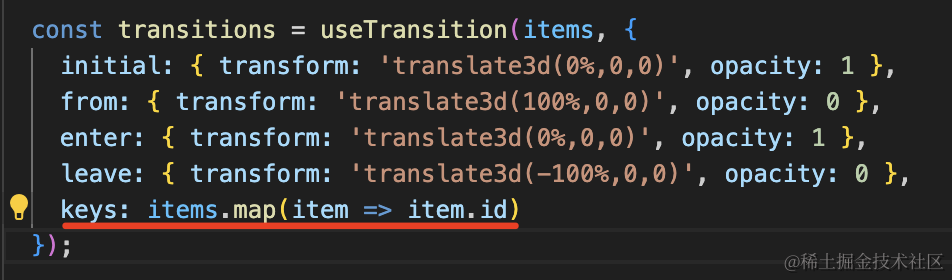
| const transitions = useTransition(
items,
options
);
|
1️⃣ **items**(必填):
2️⃣ **options**(必填):
from:初始状态(刚进入时的样式)enter:进入动画(目标状态)leave:离开动画(元素被移除时的样式)config(可选):动画配置(如 tension、friction)key(可选):唯一 key(如果 items 是对象数组,需要手动指定 key)
🔹 返回值
useTransition 返回一个数组,其中每一项都是一个对象:
item:对应 items 里的每个元素key:元素的唯一标识(可手动指定)props:包含动画样式的 style 对象,可绑定到 animated.div 上
1
2
3
4
5
6
7
8
9
10
11
12
13
14
15
16
17
18
19
20
21
22
23
24
25
26
27
28
29
30
31
32
33
34
35
36
| import React, { useState, CSSProperties } from 'react'
import { useTransition, animated, AnimatedProps } from '@react-spring/web'
import './App.css';
interface PageItem {
(props: AnimatedProps<{ style: CSSProperties }>): React.ReactElement
}
const pages: Array<PageItem> = [
({ style }) => <animated.div style={{ ...style, background: 'lightpink' }}>A</animated.div>,
({ style }) => <animated.div style={{ ...style, background: 'lightblue' }}>B</animated.div>,
({ style }) => <animated.div style={{ ...style, background: 'lightgreen' }}>C</animated.div>,
]
export default function App() {
const [index, set] = useState(0);
const onClick = () => set(state => (state + 1) % 3);
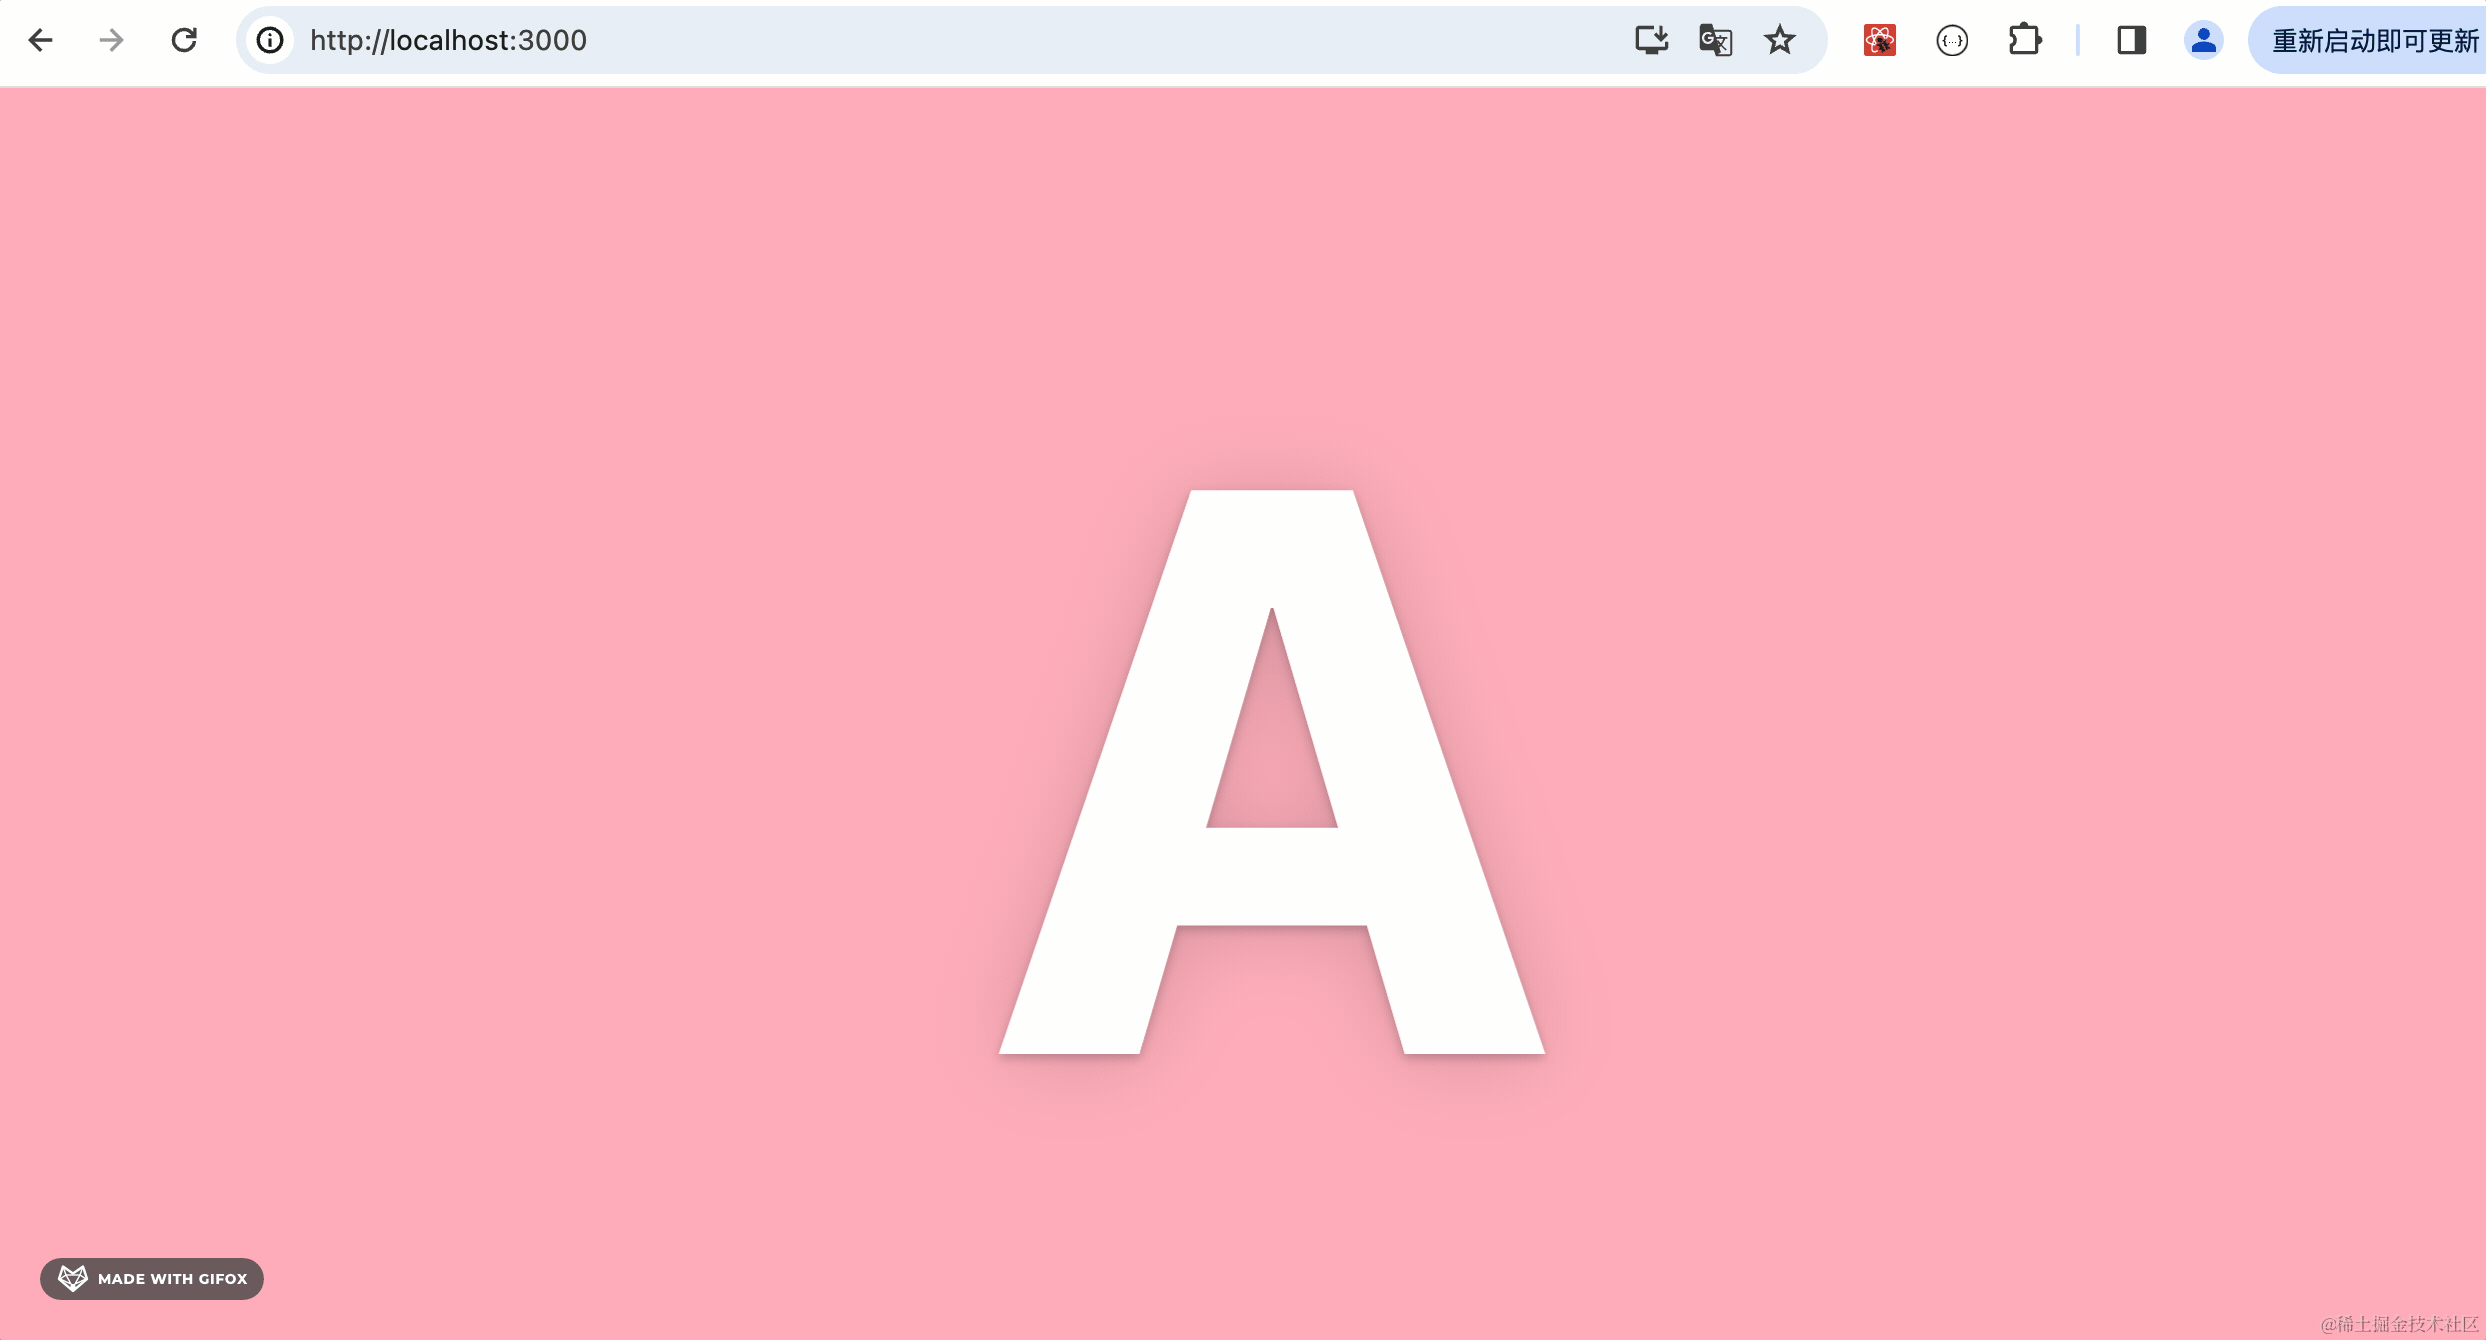
const transitions = useTransition(index, {
from: { transform: 'translate3d(100%,0,0)' },
enter: { transform: 'translate3d(0%,0,0)' },
leave: { transform: 'translate3d(-100%,0,0)' },
})
return (
<div className='container' onClick={onClick}>
{transitions((style, i) => {
const Page = pages[i]
return <Page style={style} />
})}
</div>
)
}
|
1
2
3
4
5
6
7
8
9
10
11
12
| .container > div {
position: absolute;
width: 100%;
height: 100%;
display: flex;
justify-content: center;
align-items: center;
color: white;
font-weight: 800;
font-size: 300px;
}
|
如果多个元素呢?
可以看到,每个元素都加上了过渡动画。
1
2
3
4
5
6
7
8
9
10
11
12
13
14
15
16
17
18
19
20
21
22
23
24
25
26
27
28
29
30
31
32
33
34
35
36
37
38
39
40
41
42
43
44
45
| import React, { useState } from "react";
import "./App2.css";
import { useTransition, animated } from '@react-spring/web'
export default function App() {
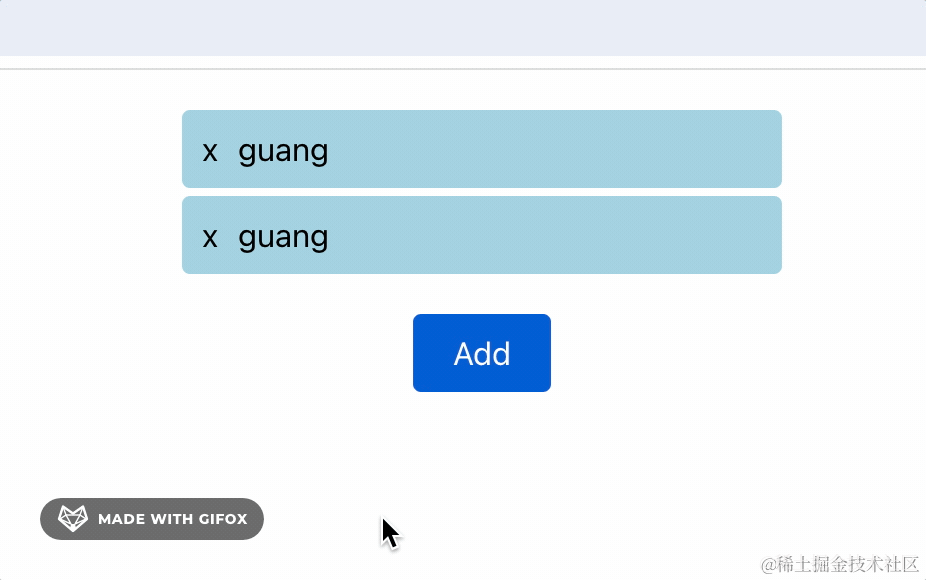
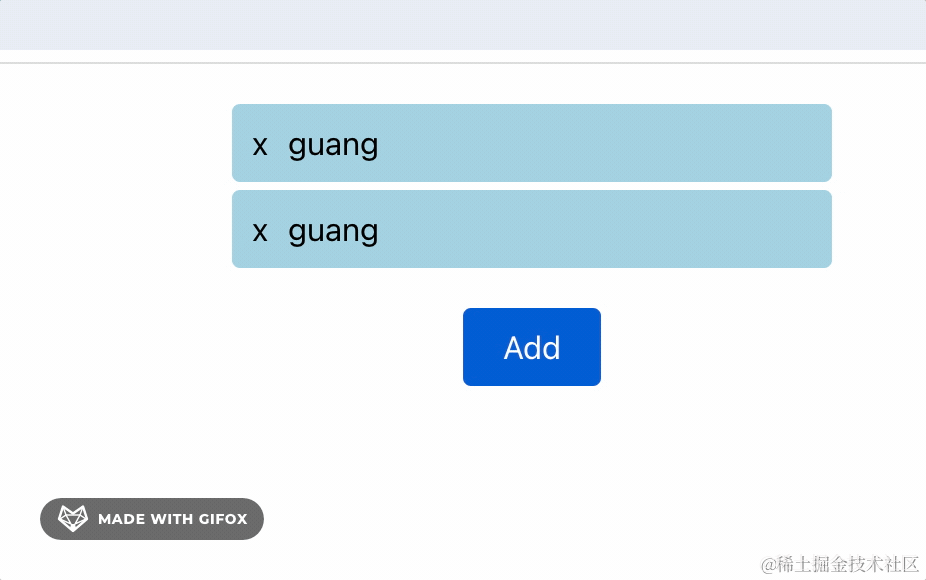
const [items, setItems] = useState([
{ id: 1, text: "guang" },
{ id: 2, text: "guang" },
]);
const transitions = useTransition(items, {
from: { transform: 'translate3d(100%,0,0)', opacity: 0 },
enter: { transform: 'translate3d(0%,0,0)', opacity: 1 },
leave: { transform: 'translate3d(-100%,0,0)', opacity: 0 },
});
return (
<div>
<div className="item-box">
{transitions((style, i) => {
return <animated.div className="item" style={style}>
<span
className="del-btn"
onClick={() => {
setItems(items.filter((item) => item.id !== i.id));
}}
>
x
</span>
{i.text}
</animated.div>
})}
</div>
<div
className="btn"
onClick={() => {
setItems([...items, { id: Date.now(), text: 'guang' }]);
}}
>
Add
</div>
</div>
);
}
|
useTransition 传单个数据就是单个元素的过渡动画、传数组就是多个元素的过渡动画,写法一样。
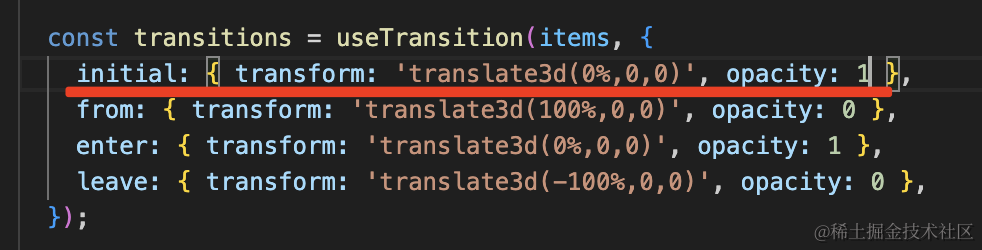
此外,现在是刚开始所有元素会做一次动画
设置下 initial 时的样式就可以了:
1
2
3
4
5
6
| const transitions = useTransition(items, {
initial: { transform: 'translate3d(0%,0,0)', opacity: 1 },
from: { transform: 'translate3d(100%,0,0)', opacity: 0 },
enter: { transform: 'translate3d(0%,0,0)', opacity: 1 },
leave: { transform: 'translate3d(-100%,0,0)', opacity: 0 },
});
|
这样最开始就不会做一次动画,只有在增删元素的时候会触发过渡动画:
这就是用 react-spring 的 useTransition 做过渡动画的方式。
此外,最好加上 keys,react-spring 会根据这个来添加 key,从而识别出元素的增删:
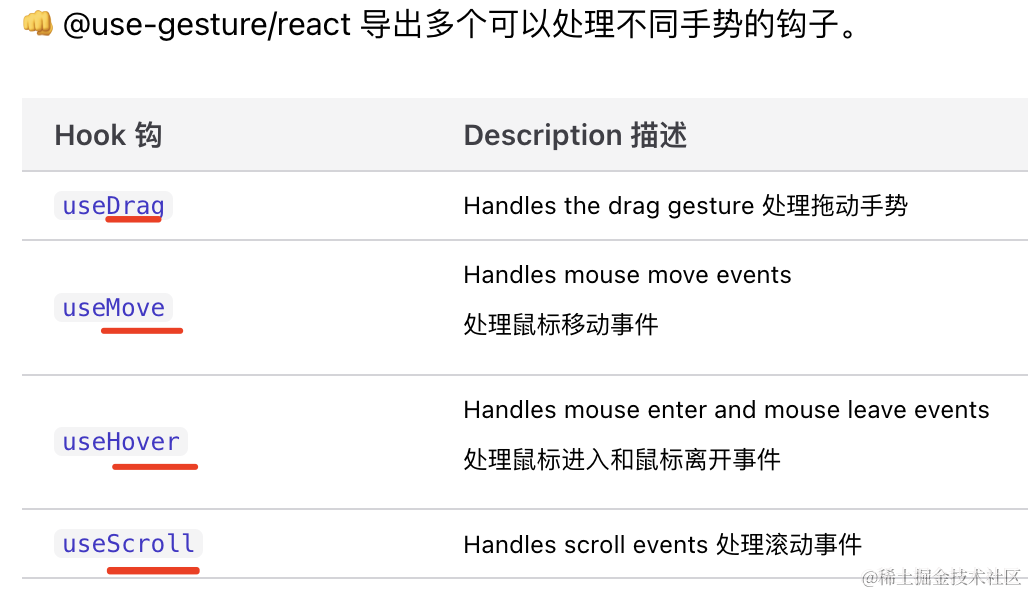
use-gesture/react
官方文档
手势库里就是对 drag、hover、scroll 这些事件的封装:
安装
1
| npm install --save @react-spring/web @use-gesture/react
|
使用
用 use-gesture 也很简单,绑定啥事件就用 useXxx,比如 useDrag、useHover、useScroll 等。

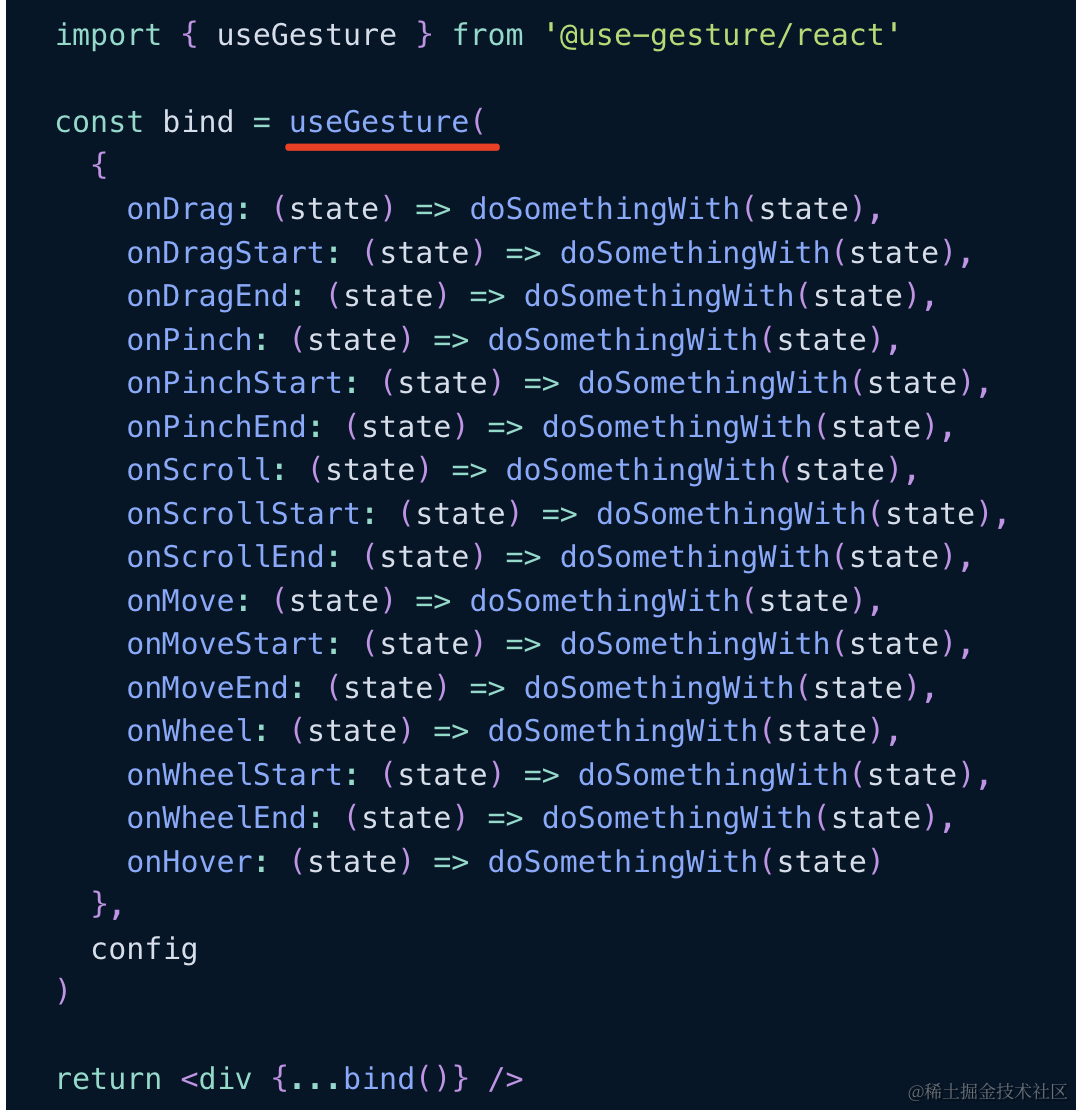
或者用 useGesture 同时绑定多种事件:
手势选项
1
2
|
useDrag((state) => doSomethingWith(state), { ...sharedOptions, ...dragOptions })
|
状态
手势库最大的好处是可以拿到移动的方向、速率、距离等信息。
这里我们拿到的这几个参数:

movement 是拖动距离 [x, y]
direction 是拖动方向 [x, y],1 代表向左(向上)、-1 代表向右(向下)。
active 是当前是否在拖动。
cancel 方法可以中止事件。
下面是完整的状态表
1
2
3
4
5
6
7
8
9
10
11
12
13
14
15
16
17
18
19
20
21
22
23
24
25
26
27
28
29
30
31
32
33
34
35
36
37
38
39
40
41
42
43
44
| const bind = useXXXX(state => {
const {
event,
xy,
initial,
intentional,
delta,
offset,
lastOffset,
movement,
velocity,
distance,
direction,
overflow,
startTime,
timeDelta,
elapsedTime,
timeStamp,
type,
target,
currentTarget,
first,
last,
active,
memo,
cancel,
canceled,
down,
buttons,
touches,
args,
ctrlKey,
altKey,
shiftKey,
metaKey,
locked,
dragging,
moving,
scrolling,
wheeling,
pinching
} = state
})
|
手势选项示例
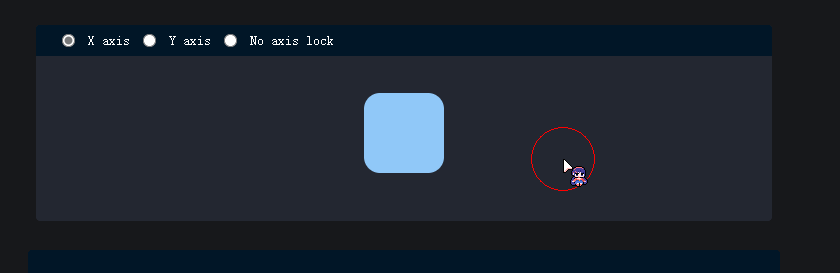
axis
axis使用户手势易于将用户手势限制为特定的轴。
1
2
3
4
5
6
7
8
| function AxisExample() {
const [{ x }, api] = useSpring(() => ({ x: 0 }));
const bind = useDrag(
({ down, movement: [mx] }) => api.start({ x: down ? mx : 0 }),
{ axis: "x" }
);
return <animated.div {...bind()} style={{ x }} />;
}
|
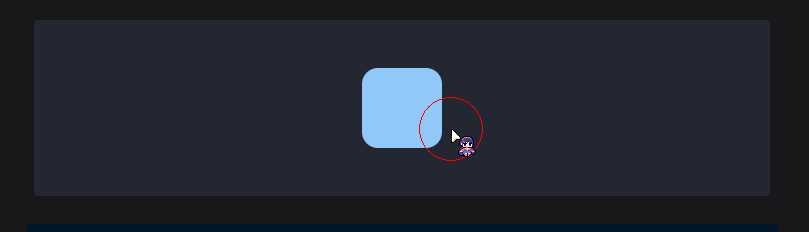
axis: 'lock'使您一旦检测到方向,就可以锁定手势的运动。换句话说,如果用户开始水平移动,则手势将锁在x轴上。
1
2
3
4
5
6
7
8
9
10
| function LockAxisExample() {
const [{ x, y }, api] = useSpring(() => ({ x: 0, y: 0 }))
const bind = useDrag(
({ down, movement: [mx, my] }) => {
api.start({ x: down ? mx : 0, y: down ? my : 0, immediate: down })
},
{ axis: 'lock' }
)
return <animated.div {...bind()} style={{ x, y }} />
}
|
bounds
1
2
3
4
5
6
7
| function BoundsExample() {
const [{ x, y }, api] = useSpring(() => ({ x: 0, y: 0 }))
const bind = useDrag(({ down, offset: [ox, oy] }) => api.start({ x: ox, y: oy, immediate: down }), {
bounds: { left: -100, right: 100, top: -50, bottom: 50 }
})
return <animated.div {...bind()} style={{ x, y }} />
}
|
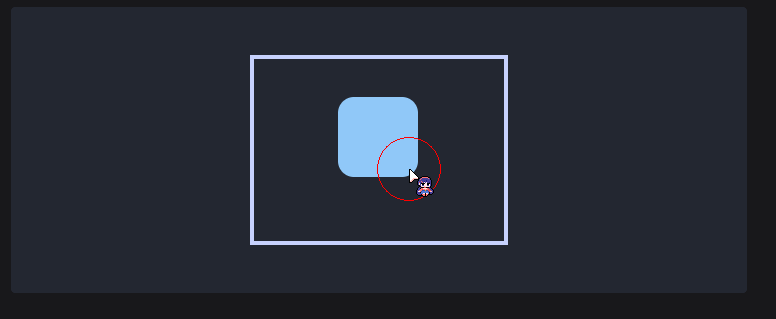
如果要将约束设置为用户手势,则应使用bounds选项。在这种情况下,手势movement和offset都将夹紧到指定的bounds 。未设置时, bounds将默认为Infinity 。
filterTaps
让可拖拽组件同时支持点击或轻触可能会比较棘手:区分“点击”和“拖拽”并不总是那么简单。
当 filterTaps 设置为 true 时,如果总位移小于 3 像素,在释放时 tap 状态属性会变为 true,而 down 始终保持 false。
1
2
3
4
5
6
7
8
9
10
11
| function FilterTapsExample() {
const [{ x, y }, api] = useSpring(() => ({ x: 0, y: 0 }))
const bind = useDrag(
({ down, movement: [mx, my], tap }) => {
if (tap) alert('tap!')
api.start({ x: down ? mx : 0, y: down ? my : 0 })
},
{ filterTaps: true }
)
return <animated.div {...bind()} style={{ x, y }} />
}
|
还有很多就不举例了,可以查看Gesture options - @use-gesture documentation
状态示例
offset
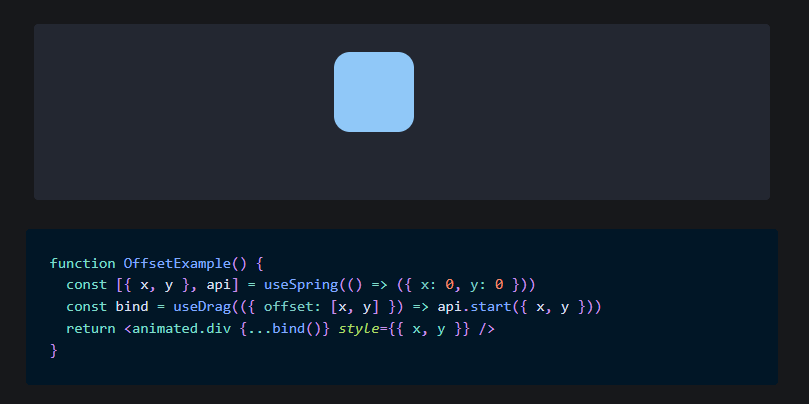
1
2
3
4
5
| function OffsetExample() {
const [{ x, y }, api] = useSpring(() => ({ x: 0, y: 0 }))
const bind = useDrag(({ offset: [x, y] }) => api.start({ x, y }))
return <animated.div {...bind()} style={{ x, y }} />
}
|
canel

如果将蓝色正方形拖到粉红色区域,您会注意到手势被取消,蓝色正方形返回其原始位置。使用以下代码触发这是非常简单的。
1
2
3
4
5
6
7
8
9
| function CancelExample() {
const [{ x }, api] = useSpring(() => ({ x: 0 }))
const bind = useDrag(({ active, movement: [mx], cancel }) => {
if (mx > 200) cancel()
api.start({ x: active ? mx : 0, immediate: active })
})
return <animated.div {...bind()} style={{ x }} />
}
|
请注意,只有drag和pinch手势是可以取消的(其他手势上的呼叫cancel将无能为力)。
swipe (drag only)
swipe是一个方便的状态属性,可帮助您检测滑动。 swipe是两个组件的向量1均为-1或0 。该组件保持到0 ,直到检测到滑动为止。 1或-1指示滑动的方向(左右 的水平轴,垂直轴的顶部或底部)。
1
2
3
4
5
6
7
8
9
10
| function SwipeExample() {
const [position, setPosition] = React.useState(0)
const { x } = useSpring({ x: position * 200 })
const bind = useDrag(({ swipe: [swipeX] }) => {
setPosition((p) => Math.min(Math.max(-1, p + swipeX), 1))
})
return <animated.div {...bind()} style={{ x }} />
}
|
这是在x轴上检测到的滑动的条件:
- drag手势结束
- drag手势不超过22ms
movement[0]优于swipe.distance[0]选项velocity[0]优于swipe.velocity[0]选项。
react-transition-group
Transition、CSSTransition、TransitionGroup、SwitchTransition
react-transition-group 是通过改变 className 来给组件加上的过渡效果的。
安装
1
2
3
| npm install --save react-transition-group
npm install --save-dev @types/react-transition-group
|
使用
CSSTransition
1
2
3
4
5
6
7
8
9
10
11
12
13
14
15
16
17
18
19
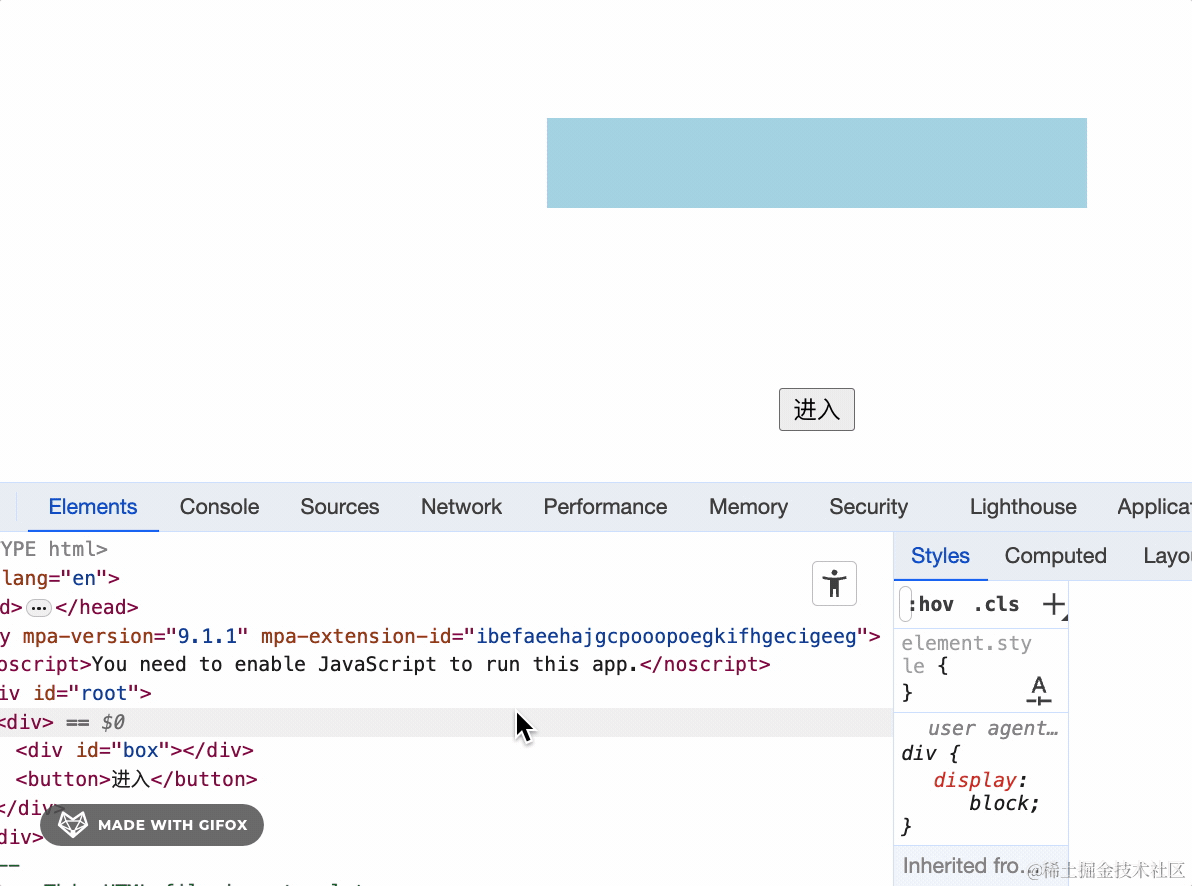
| import { useEffect, useState } from 'react';
import { CSSTransition } from 'react-transition-group';
import './App3.css';
function App() {
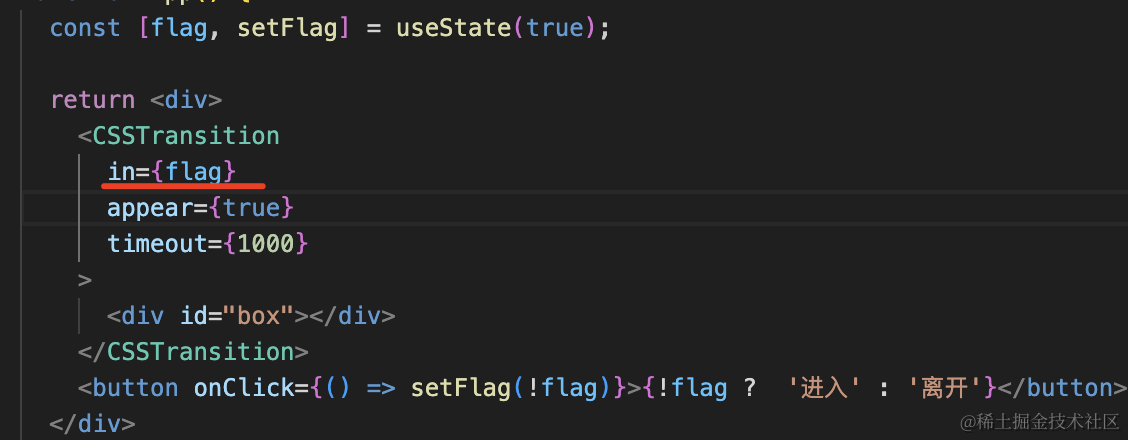
const [flag, setFlag] = useState(false);
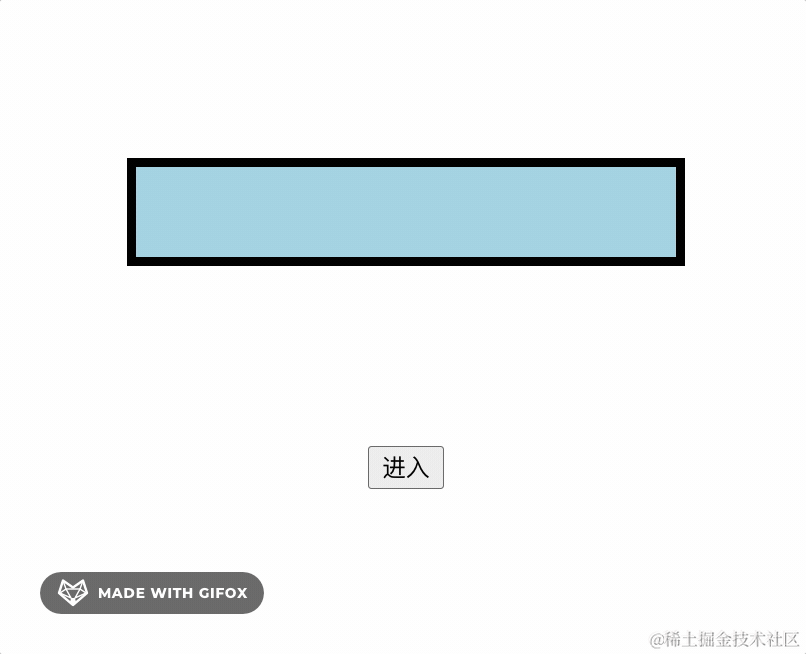
return <div>
<CSSTransition
in={flag}
timeout={1000}
>
<div id="box"></div>
</CSSTransition>
<button onClick={() => setFlag(!flag)}>{!flag ? '进入' : '离开'}</button>
</div>
}
export default App;
|
1
2
3
4
5
6
7
8
9
10
11
12
13
14
15
16
17
18
19
20
21
22
23
24
25
26
27
28
29
30
31
32
33
34
35
36
37
38
39
40
41
42
| #box {
width: 300px;
height: 50px;
background: lightblue;
margin: 100px auto;
}
button {
margin: 0 auto;
display: block;
}
.enter {
transform: translateX(-100%);
opacity: 0;
}
.enter-active {
transform: translateX(0);
opacity: 1;
transition: all 1s ease;
}
.enter-done {
border: 5px solid #000;
}
.exit {
transform: translateX(0%);
opacity: 1;
}
.exit-active {
transform: translateX(100%);
opacity: 0;
transition: all 1s ease;
}
.exit-done {
}
|
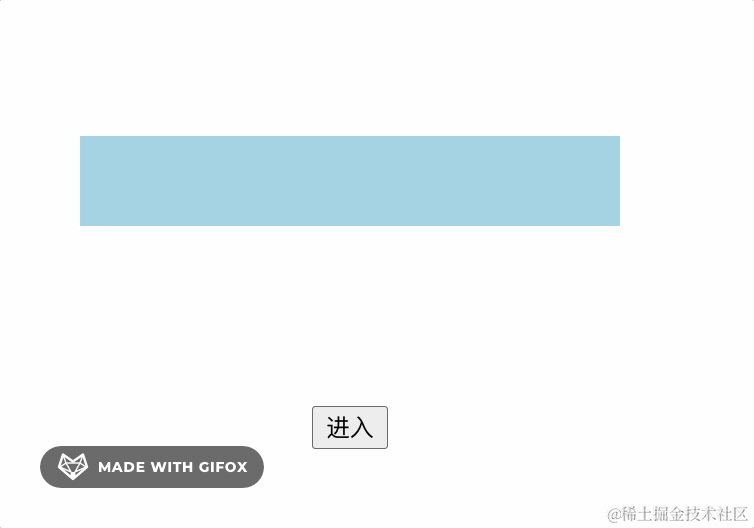
如果想最开始出现的时候就做一次动画呢?
这就需要设置 appear 的 props 了:
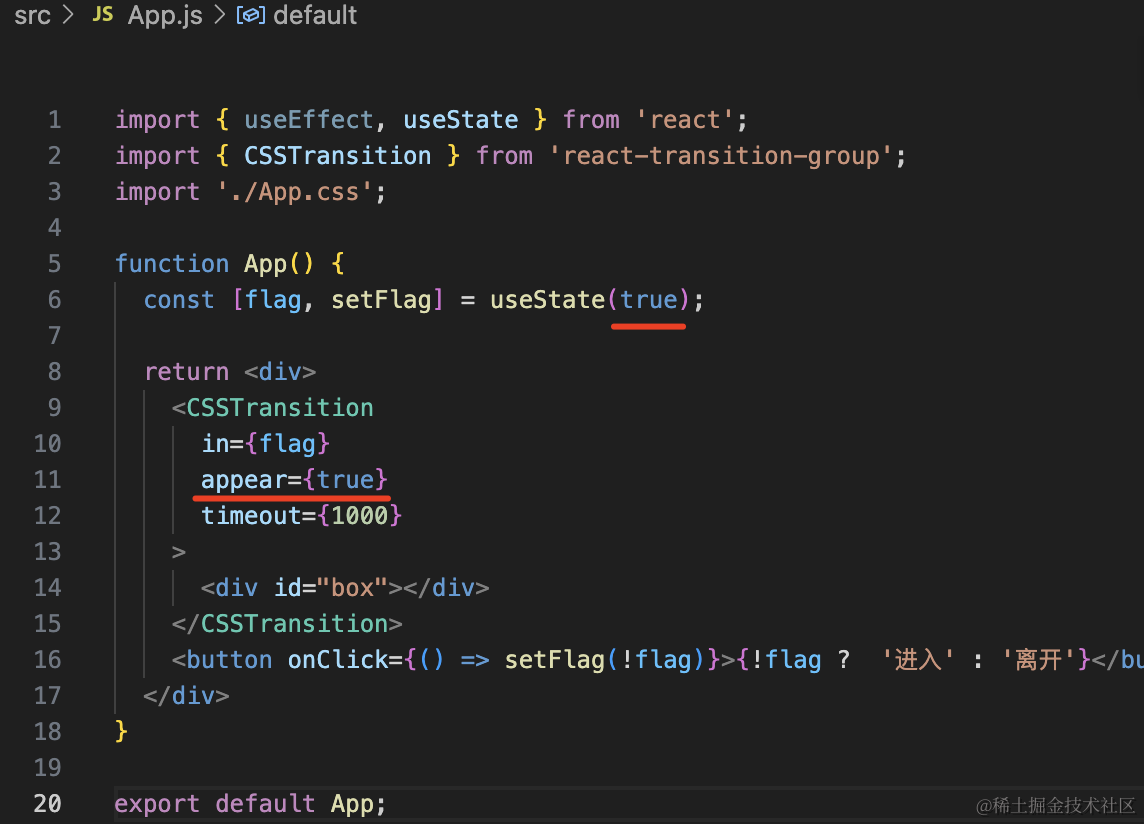
1
2
3
4
5
6
7
8
9
10
11
12
| .appear {
transform: scale(0);
}
.appear-active {
transform: scale(1);
transition: all 1s ease;
}
.appear-done {
}
|
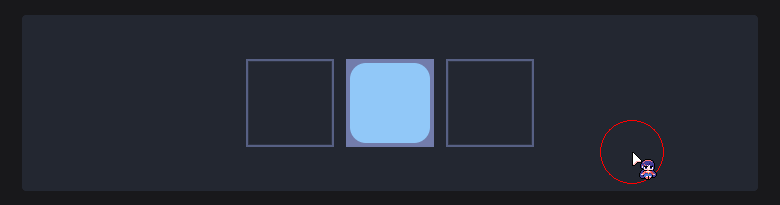
继续看 react-transition-group,现在是我们自己设置 in 的 props 来触发进入和离开动画的,如果是列表的多个 child,都想加动画呢?
这时候就用 TransitionGrop 组件。
TransitionGrop
1
2
3
4
5
6
7
8
9
10
11
12
13
14
15
16
17
18
19
20
21
22
23
24
25
26
27
28
29
30
31
32
33
34
35
36
37
38
39
40
41
| import React, { useState } from "react";
import { CSSTransition, TransitionGroup } from "react-transition-group";
import "./App4.css";
export default function App() {
const [items, setItems] = useState([
{ id: 1, text: "guang" },
{ id: 2, text: "guang" },
]);
return (
<div>
<TransitionGroup className="item-box">
{items.map(({ id, text }) => (
<CSSTransition key={id} timeout={1000}>
<div className="item">
<span
className="del-btn"
onClick={() => {
setItems(items.filter((item) => item.id !== id));
}}
>
x
</span>
{text}
</div>
</CSSTransition>
))}
</TransitionGroup>
<div
className="btn"
onClick={() => {
setItems([...items, { id: Date.now(), text: 'guang' }]);
}}
>
Add
</div>
</div>
);
}
|
1
2
3
4
5
6
7
8
9
10
11
12
13
14
15
16
17
18
19
20
21
22
23
24
25
26
27
28
29
30
31
32
33
34
35
36
37
38
39
40
41
42
43
44
45
46
47
48
49
50
51
52
53
54
| .item-box {
width: 300px;
margin: 20px auto;
}
.item {
margin: 4px 0;
padding: 10px 0;
border-radius: 4px;
background: lightblue;
}
.del-btn {
padding: 0 10px;
cursor: pointer;
user-select: none;
}
.enter {
opacity: 0;
transform: translateX(-100%);
background: lightblue;
}
.enter-active {
opacity: 1;
transform: translateX(0%);
background: lightblue;
transition: all 1s ease;
}
.enter-done {
}
.exit {
opacity: 1;
transform: translateX(0%);
background: red;
}
.exit-active {
opacity: 0;
transform: translateX(100%);
background: red;
transition: all 1s ease;
}
.btn {
color: #fff;
background-color: #0069d9;
border-color: #0062cc;
padding: 10px 20px;
border-radius: 4px;
width: fit-content;
cursor: pointer;
margin: 20px auto;
}
|
效果就是前面用 react-spring 实现过一遍的那个:
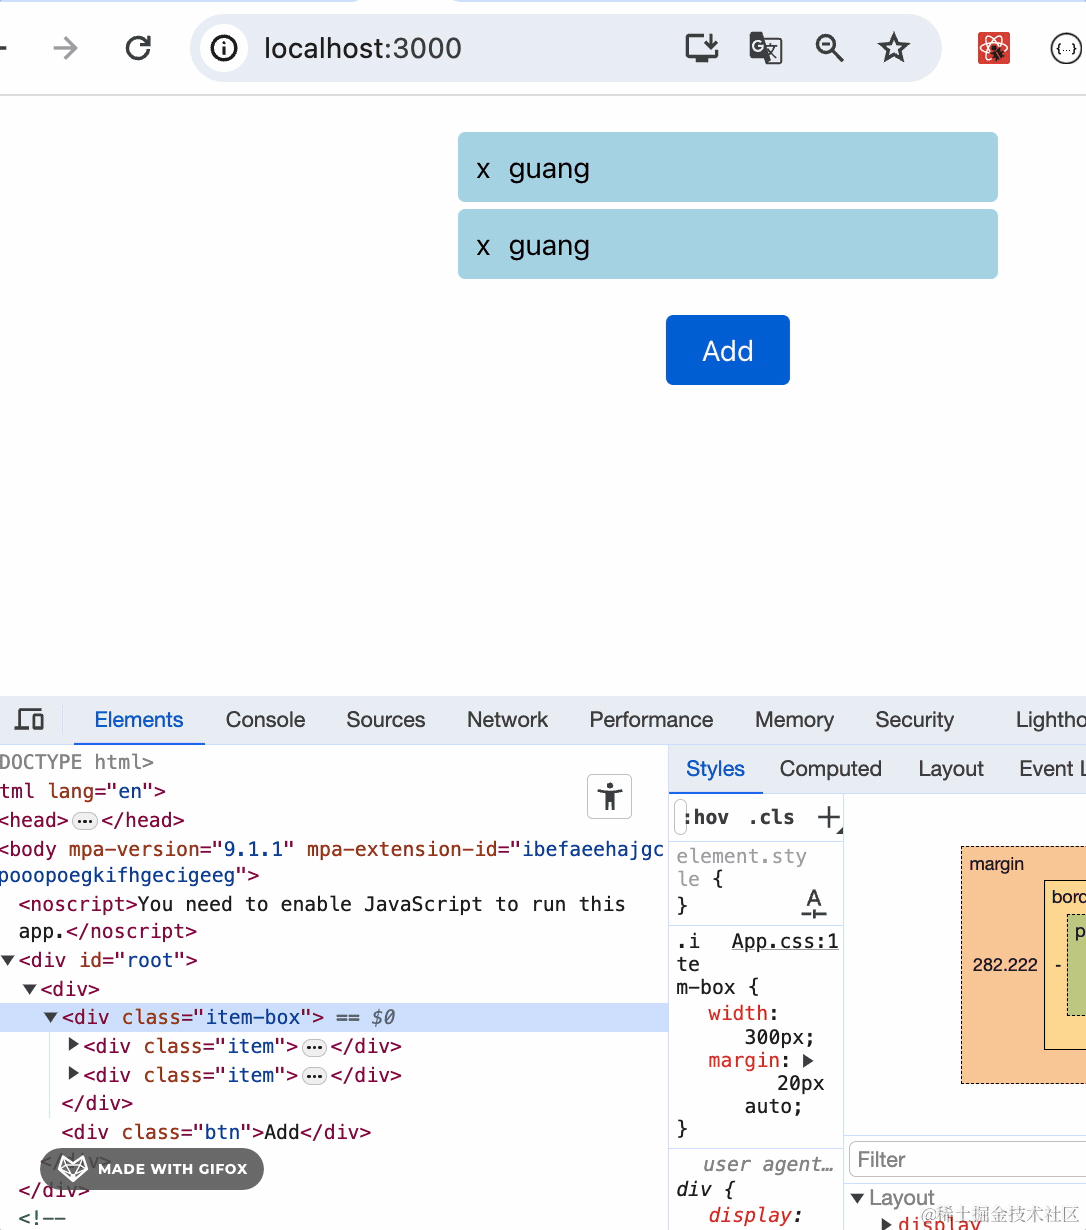
用 CSSTransition 的时候,我们需要自己设置 in 的 props 来触发进入和离开动画。
而现在只需要设置 key,TransitionGroup 会在 children 变化的时候对比新旧 item,来自动设置 in,触发动画。
这就是 react-transition-group 的常用功能。
SwitchTransition
先看下效果:
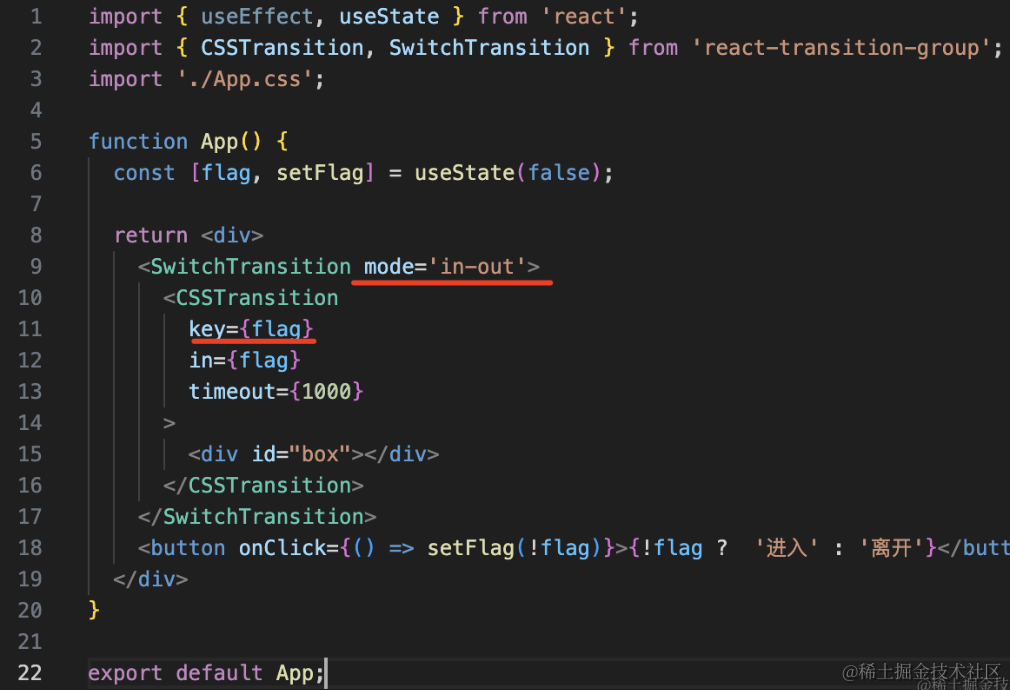
包裹一层 SwitchTransition,然后设置下 key。
当 mode 为 in-out 时:
当 mode 为 out-in 时:
这个组件就是用来控制两个组件切换时的进入、离开动画的顺序的。
Transition
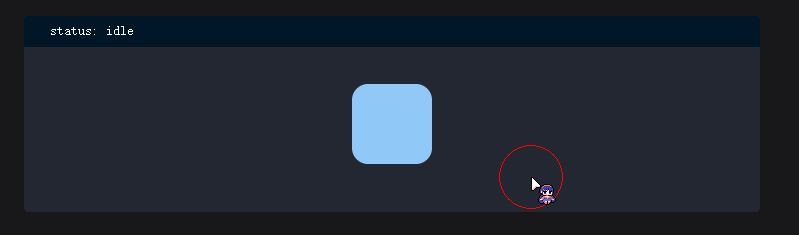
把 CSSTransition 换成 Transition,然后打印下 status:

可以看到,status 最开始是从 entering 到 entered,从 exiting 到 exited 变化,但是不会设置 className:
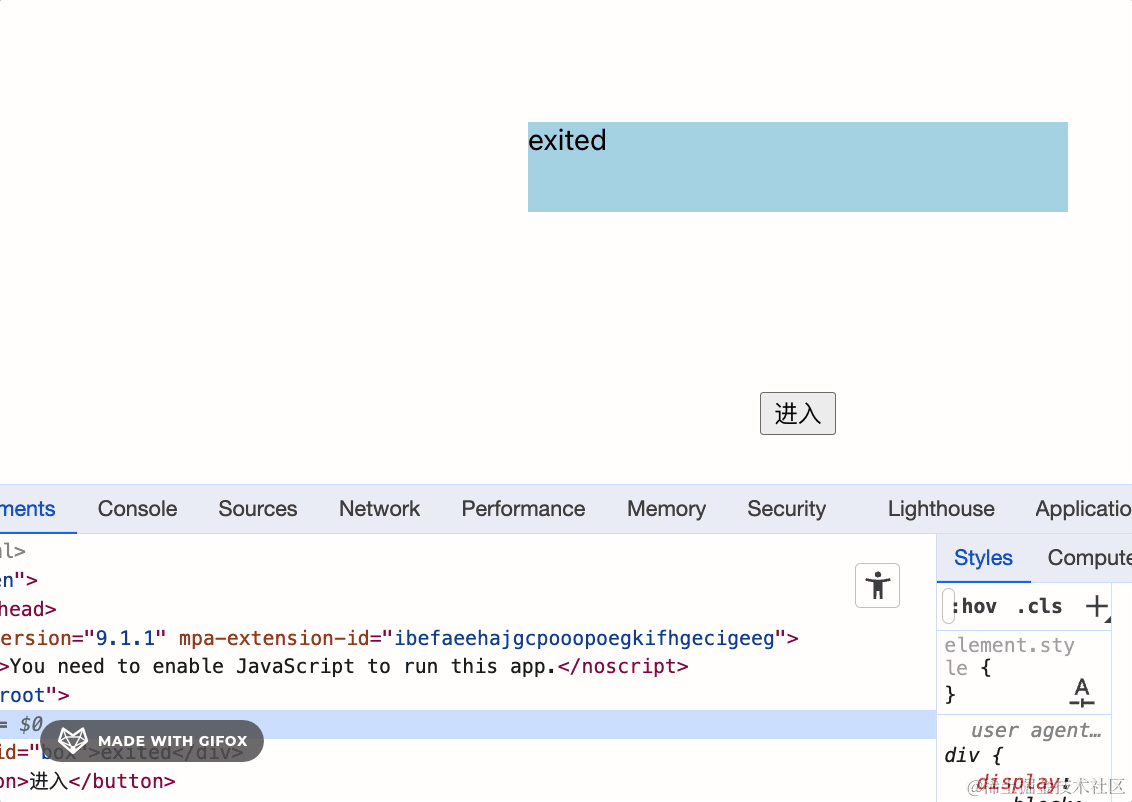
我们可以根据 status 的变化自己设置 className。
其实,CSSTransition 就是基于 Transition 封装的。
一般我们用 CSSTransition 就好了。
总结
当组件进入 dom 和从 dom 中移除的时候,发生的动画就叫做过渡动画。
react-spring 有 useTransition 这个 hook 来实现过渡动画,我们也可以用 react-trasition-group 这个包来实现。
这两个包能实现一样的功能,但是思路不同。
react-spring 有内置的动画效果,所以只要用 useTransition 设置 from、enter、leave 时的 style,它就会在数据变化的时候触发过渡动画。
而 react-transition-group 是通过 className 的修改来实现过渡动画,而且要自己用 transition 的 css 来控制动画效果:
进入的时候会触发 enter、enter-active、enter-done 的 className 切换
离开的时候是 exit、exit-active、exit-done 的切换
如果设置了 appear 参数,刚出现的时候,还会有 appear、appear-active、appear-done 的切换。
它有 Transition、CSSTransition、TransitionGroup、SwitchTransition 这 4 个组件。
常用的就是 CSSTransition 和 TransitionGroup,这俩是用来做单个元素的过渡动画和多个元素的过渡动画的。
而在 react-spring 里,单个元素的过渡动画和多个元素的过渡动画写法没区别。


